
Royal Navy battlecruiser HMS Invincible
HMS Invincible
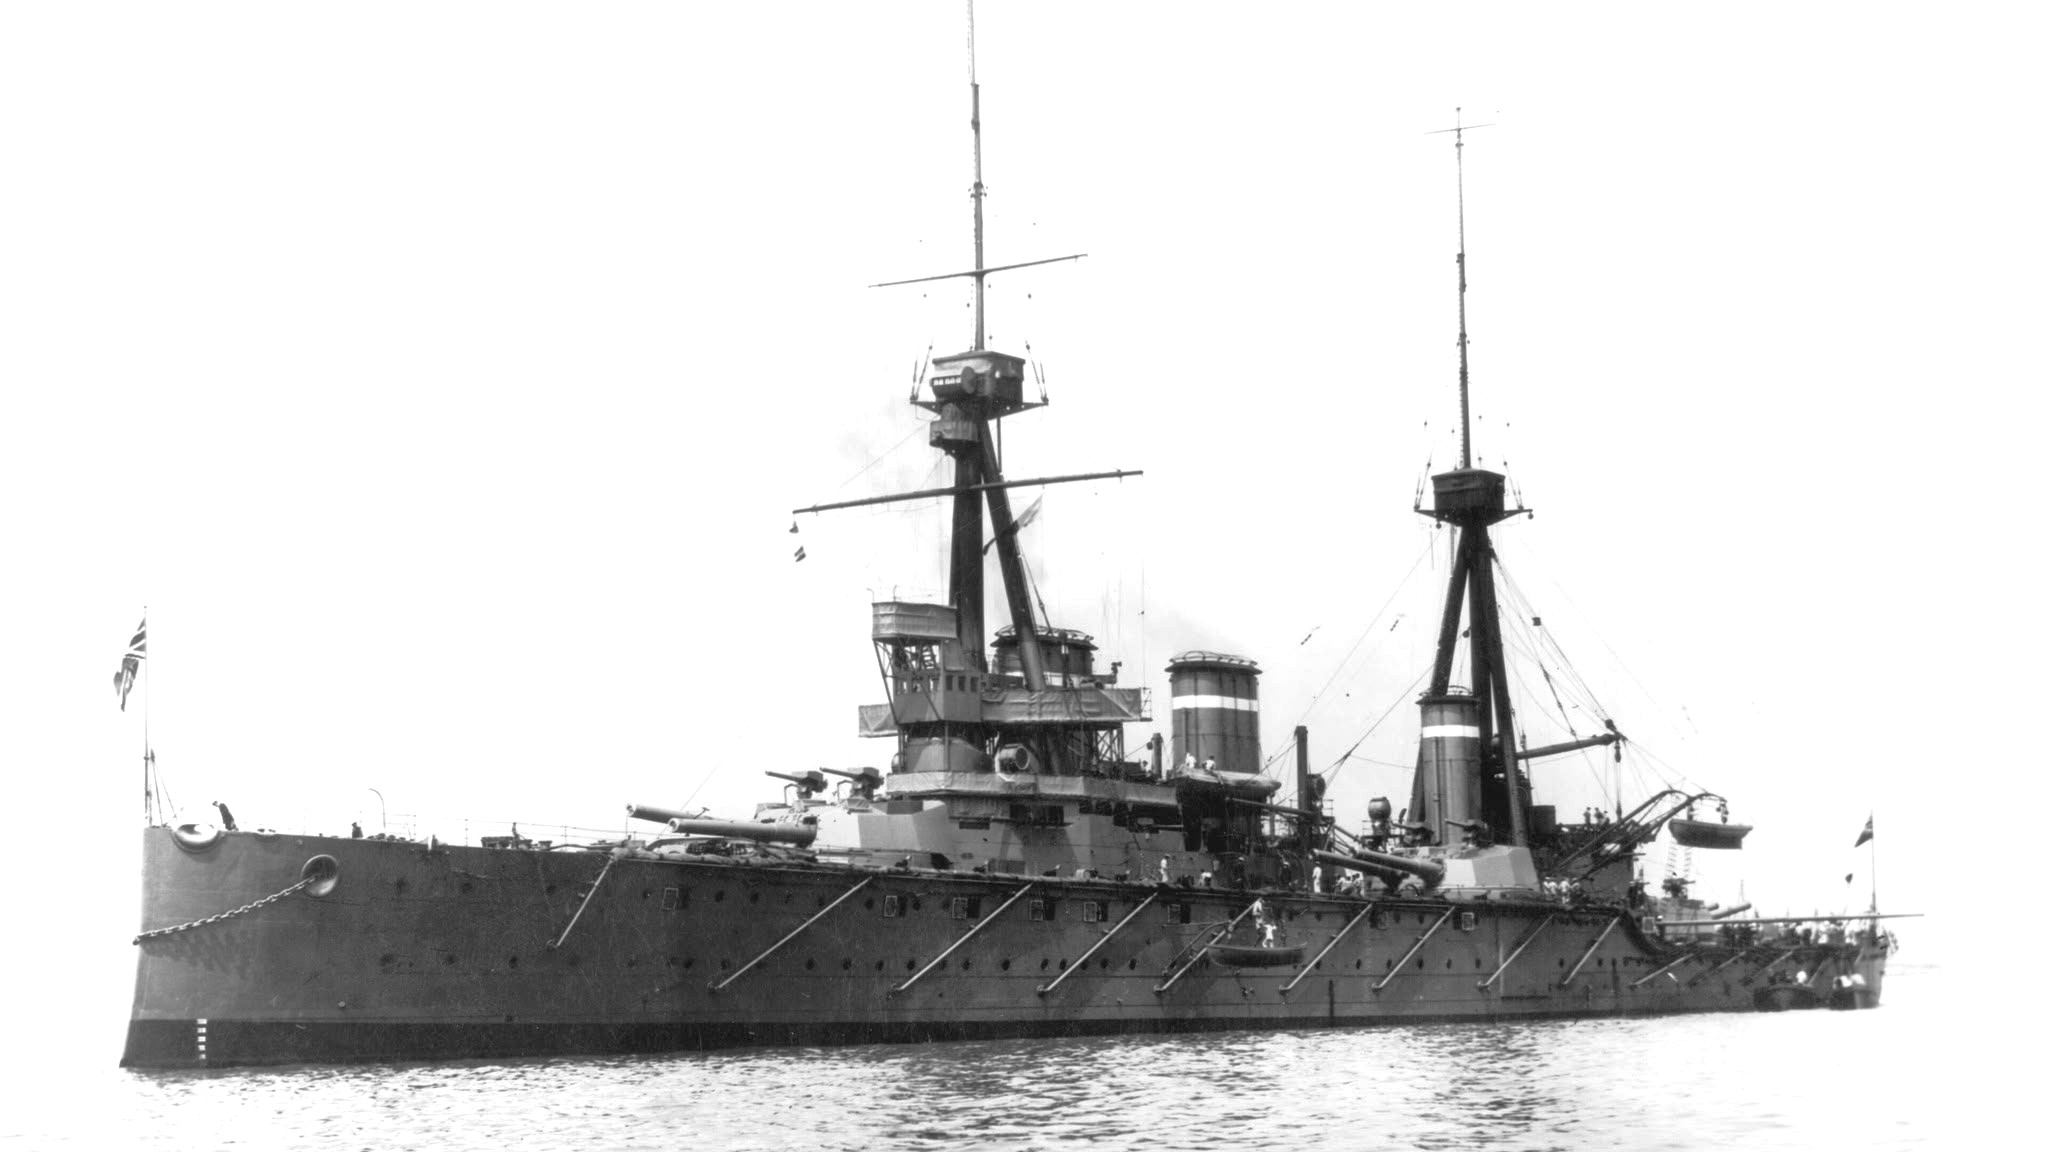
(Royal Navy Photo)
HMS Invincible was the lead ship of her class of three battlecruisers built for the Royal Navy during the first decade of the twentieth century and the first battlecruiser to be built by any country in the world. During the First World War, she participated in the Battle of Heligoland Bight in a minor role, as she was the oldest and slowest of the British battlecruisers present. During the Battle of the Falkland Islands, Invincible and her sister ship Inflexible sank the armoured cruisers Scharnhorst and Gneisenau almost without loss to themselves, despite numerous hits by the German ships.
She was the flagship of the 3rd Battlecruiser Squadron during the Battle of Jutland in 1916. The squadron had been detached from Admiral Beatty’s Battlecruiser Fleet a few days before the battle for gunnery practice with the Grand Fleet and acted as its heavy scouting force during the battle. She was destroyed by a magazine explosion during the battle after the armour of one of her gun turrets was penetrated. (Wikipedia)
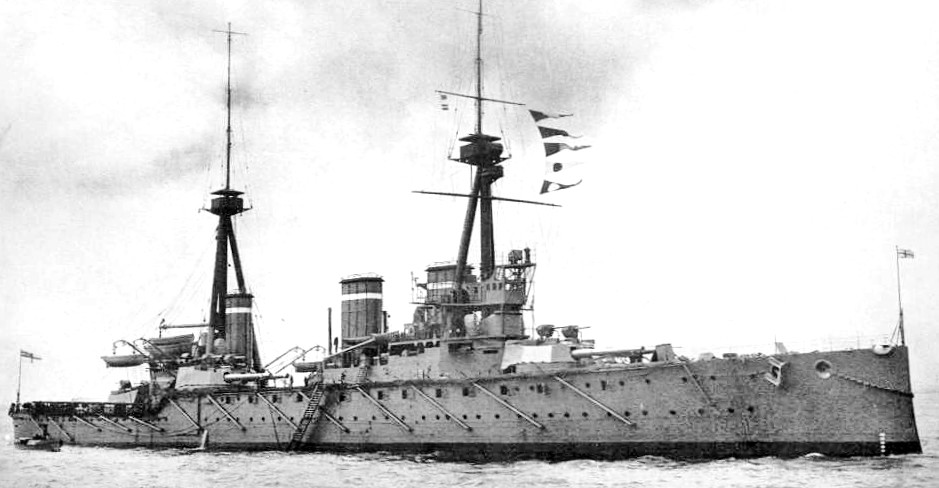
(Royal Navy Photo)
HMS Invincible.
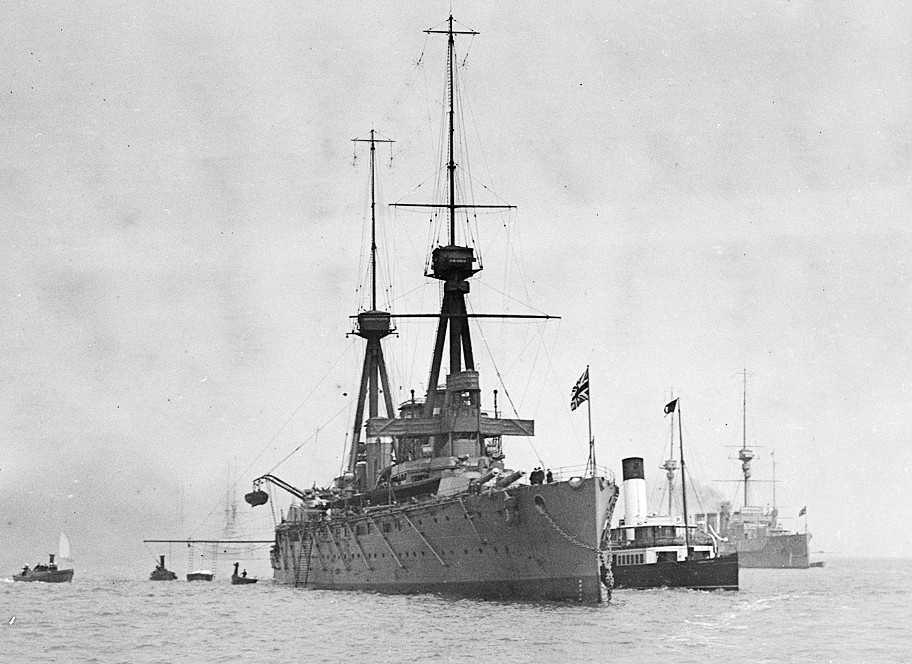
(National Maritime Museum, Greenwich, UK Photo)
British battlecruiser HMS Invincible anchored at Spithead, 1 July 1909.
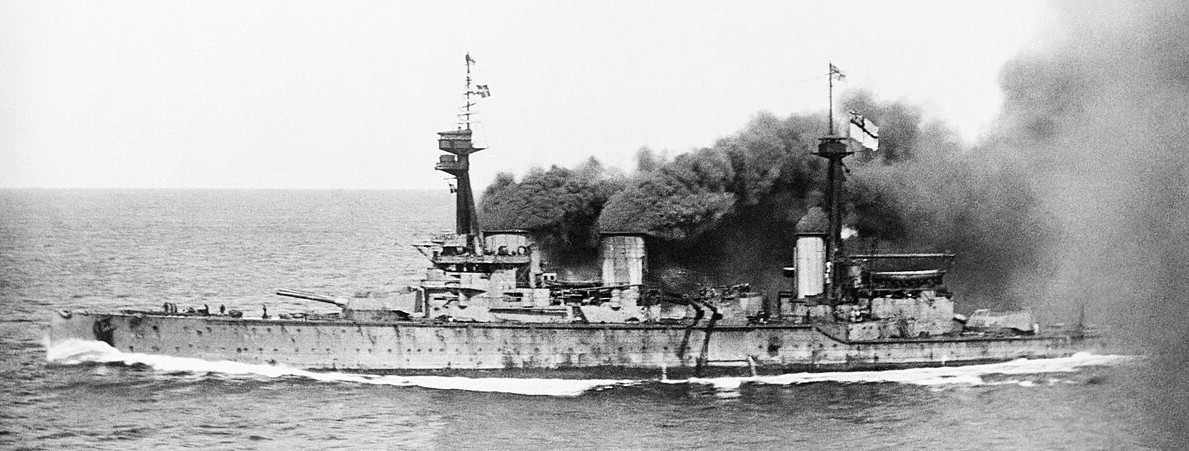
(Royal Navy Photo)
HMS Invincible going into action at the battle of the Falkland Islands.
January 1915 saw a slight re-organisation of the Grand Fleet’s scouting forces and the creation of the Battle Cruiser Fleet. Vice-Admiral Beatty commanded from his Flagship HMS Lion, Read-Admiral Osmand de Beauvioir Brock commanded the 1st Battlecruiser Squadron consisting of HMS Princess Royal (flag), Queen Mary and Tiger. The 2nd Battlecruiser Squadron comprised the second generation of Indefatigable Class Battlecruisers, New Zealand (flagship of Rear-Admiral Sir William Pakenham), Indefatigable and HMAS Australia, and then finally the 3rd Battlecruiser Squadron -comprising all three of the original Invincible Class Battlecruisers, Rear Admiral the Honourable Horace Hood hoisted his flag in HMS Invincible on May 26th 1916 while the Squadron was assembled in Scapa Flow conducting intensive Gunnery Trials, the rest of the Squadron consisted of HMS Inflexible and Indomitable.
On May 30th 1916 the Squadron sailed with Admiral Jellicoe and the main body of the Grand Fleet.
For the majority of the sweeps into the North Sea life was conducted with regular predictability. So far as anyone knew this was just another sweep to add to the countless forays into the North Sea to try in an attempt to try and catch either Admiral Hipper’s battlecruiser’s, or the big prize the High Seas Fleet itself. No one had much expectation for action as the Grand Fleet zig-zagged at 15kts towards the rendezvous with the Battlecruiser Fleet Admiral Jellicoe had set in the Skagerrak
May 31st 1916 saw the Grand Fleet at sea. The main battle squadrons in a cruising formation with Invincible leading her squadron in an advanced position stationed 4 miles ahead of the Grand Fleet, and slightly ahead of the 1st and 2nd Cruiser Squadrons, and accompanied by the Light Cruisers HMS Chester and Canterbury, and the Destroyers HMS Christopher, Ophelia, Acasta and Shark. Around 2.20pm the Grand Fleet received the first reports of German units from HMS Galatea, and on his own accord Hood ordered the 3rd Battlecruiser Squadron and its attendant light units to increase speed to 22kts. His intention seemingly to advance on a South Easterly course to bring himself to the East of the German Squadron to try and cut off their line of retreat back to the Heligoland Bight.
At 4:12 Hood ordered an increase in speed to 25kts – top speed on his own initiative to try and join Beatty. Owing to errors in the dead reckoning of the positions of Iron Duke and Lion Invincible and the 3rd Battlecruiser Squadron actually passed some 18 miles to the east of Beatty, putting Hood on the disengaged side of the Germans, even though by 5:40 he was roughly on the same latitude.
Around 5.27pm the 3rd Battlecruiser Squadron was around 25 miles ahead of the Grand Fleet in line ahead, with Canterbury and Chester at the edge of visibility – about 5 miles on Invincible’s Port and Starboard beam respectively, keeping eye out of Beatty, or Hipper or anyone on a broad front around 20 miles wide.
The German Official History comments that “the position that the 3rd Battlecruiser Squadron thus occupied, and which was neither contemplated nor arrived at due to skilled leadership, was however, to influence later events favourable for the British Fleet. While the head of the German Line was hurrying on (unwittingly) towards the advanced forces of the Grand Fleet, which were approaching from the North-West, Hood’s Squadron suddenly appeared on the disengaged side of the High Seas Fleet.”
As Hood and his squadron were getting into this position at 5:30pm Chester spotted firstly gun flashes, followed by the dimly outlined shape of a three funnelled cruiser in the growing murk of the late afternoon, this was soon followed by sighting several Torpedo Boat Destroyers. Chester had discovered the German 2nd Scouting Group, positioned slightly ahead off, and well off on the disengaged side of the Admiral Hipper’s 1st Scouting Group.
Chester closed to around 6000 yards before flashing a recognition signal to the ships to try and identify them. The German Cruisers flashed part of the British reply back to Chester before opening up a furious cannonade on the outnumbered Light Cruiser. Hood saw these gun flashes and marched to the sound of the guns, turning the rest of his squadron round onto a course of NW, taking him back towards Jellicoe and now running on a converging course to Beatty and Hipper’s Squadrons. By 5:55 Invincible and her sisters, which had only the day before been conducting Gunnery exercises in Scapa Flow were in a position to open fire. The difference was now these were live targets.
At ranges of between 6 and 8000 yards they subjected the German Light cruisers to a taste of their own medicine. Invincible fires off 5 salvos -30 rounds at the German Cruisers scoring a hit that left SMS Wiesbaden dead in the water, and a possible second hit on the same ship. Inflexible fired of 15 rounds scoring 1 hit on SMS Pillau which wrecked her chart house, and exploded disabling four of her boilers. Indomitable fired off 30 rounds too, and its thought may have scored a hit on SMS Frankfurt, but its not totally clear. All three had stopped firing by 6pm.
The German Cruisers could only barely distinguish the shapes of their assailants; Admiral Bodicker’s report at 6pm from his flagship SMS Frankfurt was that he had discovered a British Battleship Squadron, before dropping smoke and turning away. On receiving this report Admiral Hipper, 3 miles to the SSW also turned his battlecruisers about to regain the safety of the High Sea’s Fleet which at this point was about another 2 miles further to the South. Jellicoe and his Grand Fleet was around 5 miles to the NW and steaming hard at 20kts to get to the Action zone, and was very close to being able to deploy, once someone had given him some solid information of Hipper and Scheer’s whereabouts.
By 6pm this short violent encounter was over, with Chester now nestled in the disengaged lee of Hood’s big ships and licking her wounds, and the Germans having made smoke and turned away after firing torpedoes.
By 5.56pm, about the same time Invincible was letting rip with her 12” guns on the Light Cruisers of 2nd Scouting Group HMS Lion and the remains of the Battlecruiser Fleet were nearing the end of the Run to the North, it was around this time that Lion sighted the Starboard Column of Jellicoe’s battleships, continued errors in gauging his position using dead reckoning meant that he was actually several miles westward of where he said he was, Jellicoe had been aiming for his Flagship Iron Duke to meet Lion almost head on, instead here was Beatty several miles off to Jellicoe’s Starboard Bow.
On the German side, alarm was raised by the prospect of the main British Fleet being ahead of the German Squadrons, and as a result of this seemingly more important target a confused and disorganised massed torpedo attack was attempted at what they thought was the Grand Fleet. XII Flotilla, attacked in two waves firing off a total of 6 torpedoes at the 3rd Battlecruiser Squadron, these were followed by IX Flotilla which due to the positions of XII Flotilla could only fire three torpedoes. II Flotilla also attacked but between the four large G Class Boats could only fire 1 Torpedo.
These attacks were countered by the four destroyers that accompanied the 3rd Battlecruiser Squadron Shark, Ophelia, Christopher and Acasta charged forward to defend the British Capital Ships, during this confused melee HMS Shark was hit hard, disabled, eventually to sink. These German Torpedo attacks however proved crucial, as they somewhat shot their bolt too early, and this stopped a much more organised attack from taking shape against Beatty or Jellicoe during the Grand Fleet’s deployment. Hipper’s about turn also had the effect of blunting the German scouting mission, meaning they were effectively sailing blind into Jellicoe’s deathly embrace.
At 6:05 Hood turned his squadron again, this time on a westward course heading right for Beatty and the remaining Battlecruisers, Invincible spotted Lion at around 6:12, and Admiral Hood smartly brought his squadron about on a new course due east at 6:17 about 2000 yards ahead of Beatty’s Flagship.
Hood was now at the head of the British line, and combined with Beatty’s Battlecruiser Fleet formed an incredibly powerful fast squadron with a massive concentration of Firepower, and from 6:20 the 3rd Battlecruiser Squadron had swung their guns around from Port to Starboard and opened a withering fire on the German Battlecruiser Squadron. Invincible scored her first hit around 6.26, but once she had found the range she repeatedly hit SMS Lutzow with an accurate hail of 12” shells, scoring 8 hits in 8 minutes. Inflexible also joined in providing effective support to her Flagship Sister repeatedly straddling the German Flagship and scoring a hit of her own. In reply the Germans could barely make out who was shooting at them. SMS Moltke reports that the 1st Scouting Group were under the heavy and concentrated fire of a British Battle Squadron her initial report suggested they were facing eight or ten battleships of the Iron Duke or Queen Elizabeth classes. All they could see however were gun flashes and then the monstrous 200ft high pillars of water as shells repeatedly straddled their targets at ranged around 11-12’000 yards. On board SMS Derfflinger Korvettenkapitain von Hase noted “several shells pierced our ship with terrific force and exploded with tremendous roar, which shook every seam and rivet. The Captain had frequently to steer the ship out of the line in order to get out of the hail of fire. It was pretty heavy shooting. This went on until 6.29.” It was probably around this time that Admiral Hood called up to Commander Hubert Dannreuther, Invincible’s Gunnery Officer positioned in her foretop, his words to the Commander were very clear “Your firing is very good. Keep at it as quickly as you can. Every shot is telling!”
At 6:30 the shifting smoke and fog was seen to clear like a veil or two curtains opening up at a theatre, brilliantly exposing HMS Invincible in the evening light. Both SMS Lutzow and Derfflinger adjusted their aims and in the next two minutes fired off three salvos. SMS Lutzow fired her first at a range of 10’900 yards, and found it fall 400 yards over the target. The second was a straddle and the third was a straddle with what seemed a clear hit. SMS Derfflinger in the previous few minutes had fired 5 salvos at Invincible with no effect, all of them falling short. However in the intervening period between 6:30 and 6:34 she fired three more at Invincible at ranged between 9600 and 9800 yards. All three were seen to straddle, and Derfflinger also claimed a hit with her third.
Miraculously inside Q Turret which was manned by the Royal Marines Private Bryan Gasson who was stationed at the rear of the Turret and was working as a Spotter and Gun layer for the Turret noted “Suddenly our midship turret manned by the Royal Marines was struck between the two 12” guns and appeared to me to lift off the top of the turret and another from the same salvo followed. The Flashes passed down to both midship magazines. The explosion broke the ship in half. I owe my survival to the fact that I was in a separate compartment at the back of the Turret.
The Offical German History gives the credit for sinking HMS Invincible to SMS Lutzow, which might have an element of poetic justice about it, as it was HMS Invincible that scored the hit forward that caused the flooding that eventually doomed the German Flagship.
The magazine explosion that caused Invincible to sink blew both P and Q turret away from the ship. They now lie several hundred yards astern of the wreck, the middle ends of the ships sank almost immediately to the bottom, with the wrecked ends coming to rest on the sea floor with the tips of her bow and stern still showing visible above the surface. They would remain upright as a grim Headstone to Invincible and her crew for 24 hours before finally sinking to the sea floor. Gasson had been lucky and was blown from the turret into the sea. Dannreuther from his position in the Foretop waited for the raising sea to meet the spotting top before he calmly stepped out into it. He and three others found one of Invincible’s Target rafts had worked free and was floating, and so they used that as support until a passing destroyer – HMS Badger was sent to pick up survivors.
Bryan Gasson would later find himself as a guest of honour when the Royal navy next commissioned a HMS Invincible in 1980. He passed away the next year aged 86.
These two men, and four others were the lucky ones from war’s lottery. 1032 including Admiral Hood, who many had tipped as a Brain in the service and destined for a future Fleet command went down with their ship.
Sources:
Jutland: An Analysis of the Fighting – NJM Campbell
British Battleships of World War One – RA Burt
The Rules of the Game: Jutland and British Naval Command – A Gordon.
From the Dreadnought to Scapa Flow Vol. III. Jutland and after: May 1916-Dec 1916 – AJ. Marder Jutland 1916: Death in the grey wastes – N Steel & P Hart
Jutland: The German Perspective – VE Tarrant
Royal Maritime Museum Greenwich: Museum Files.
Jutland 1916.com Ships Stories.
Imperial War Museum – Lives of the First World War